Saturday, 7 January 2012
Monday, 2 January 2012
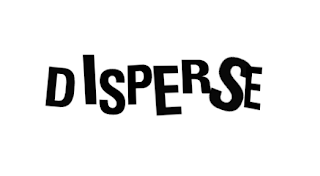
DISPERSE/video1
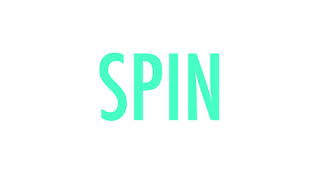
For the last section of the video i used separate layers for each letter and played around with opacity and dimensions (with the letters becoming more translucent as they come 'through' the screen. By clicking the '3d' box after effects allowed me to experiment with the x, y & z axis meaning the letters could disperse in different directions.
Sunday, 1 January 2012
Wednesday, 28 December 2011
Tuesday, 13 December 2011
AFTER EFFECTS//third session
KEYFRAME INTERPOLATION

<< straightens up the curved path
/ select a key frame>animation>keyframe interpolation
/ same result as above, different method
/ right clicking on the keyframe
/ select all keyframe>toggle hold keyframe
this means that there are no inbetween sections (the image will jump to positions rather then move smoothly)
^^ applying the 'hold keyframe' to the word blink in order to create that quick action of blinking
In order to make the movement between key frames even go to > rove across time & this equals the time & movement of the action.
USING ILLUSTRATOR PATHS
^^ simple copy n paste into after effects (after selecting position & activated key frame)
/ the shape then moves around the illustrator shape
/ if necessary go animation>keyframe assistance>time-reverse keyframe in order to reverse the direction of movement
/ layer>transform>auto-orient in order to make the circle orbit the shape

<< mask layer (either by selecting the shape tool (& layer) or selecting the pen tool
when importing type from illustrator whilst the layer is selected the type appears as separate masks
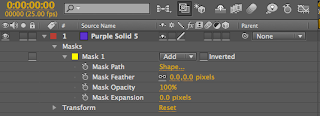
/ pressing 'm' whilst all masks are selected allows you to see your mask properties
/ whilst all layers are selected you can then create keyframes and edit the animation:
/ by selecting 'toggle switches/modes' more options become available
/ alpha & luma refer to the lighter/darker layors
/ working with a larger image then the frame allows you to create movement (using position)

<< straightens up the curved path
/ select a key frame>animation>keyframe interpolation
/ same result as above, different method
/ right clicking on the keyframe
/ select all keyframe>toggle hold keyframe
this means that there are no inbetween sections (the image will jump to positions rather then move smoothly)
^^ applying the 'hold keyframe' to the word blink in order to create that quick action of blinking
In order to make the movement between key frames even go to > rove across time & this equals the time & movement of the action.
USING ILLUSTRATOR PATHS
^^ simple copy n paste into after effects (after selecting position & activated key frame)
/ the shape then moves around the illustrator shape
/ if necessary go animation>keyframe assistance>time-reverse keyframe in order to reverse the direction of movement
/ layer>transform>auto-orient in order to make the circle orbit the shape

<< mask layer (either by selecting the shape tool (& layer) or selecting the pen tool
when importing type from illustrator whilst the layer is selected the type appears as separate masks
/ pressing 'm' whilst all masks are selected allows you to see your mask properties
/ whilst all layers are selected you can then create keyframes and edit the animation:
/ by selecting 'toggle switches/modes' more options become available
/ alpha & luma refer to the lighter/darker layors
/ working with a larger image then the frame allows you to create movement (using position)
Tuesday, 6 December 2011
AFTER EFFECTS//second session
photoshop
/ using the preset 'film & video' allows you to view all the presets that'd be available in after effects
/ by clicking 'pal d1/dv widescreen square pixel' it will ensure the document is the same size as the after effects composition
/ the coloured lines act as a guide for screen design
<< transparent background, allows you to place the file into the after effects document
/ you want to make sure the artwork is the right size in order to prevent pixilation
/ file>import>file
/ footage file occupy one layor
/ it's best to keep all images/photoshop files/after effects in one folder
/ drag & drop the layor onto the composition
/ for a document with multiple layors, import>composition
<< working with each individual layor
/ difference between importing as 'composition' & 'composition - retain layer sizes' :

<< 'composition'

<< 'composition'
<< 'composition - retain layer sizes'

illustrator
/ importing an illustartor file> format set up same as photoshop
/ when imported, illustrator files become rasterized creating a pixelated image:

illustrator
/ importing an illustartor file> format set up same as photoshop
/ when imported, illustrator files become rasterized creating a pixelated image:
Subscribe to:
Posts (Atom)


